

After my post on Live debugging with Charles, Nick Desaulniers asked if I knew if it was possible to proxy device traffic via Charles. I didn't, but I did know that if it was possible it was sure to come in handy.
10 freshly shaved yaks later…
This post details getting FFOS (I'm using a flame with FFOS 2.1) to use Charles Proxy for all requests so we can debug requests on the phone. I'm using OSX for the rest of the commands etc, but this should work similarly on Linux just be prepared to changes a few paths here and there as required. You'll need the usual adb etc before you start.
As always, respect the yaks and run these steps at your own risk.
Setting up FFOS to use a proxy
First you need to know your local network ip address. You'll typically be running all this on wifi. The expectation is that your phone and computer are running on the same wifi network.
This command should give you the primary interface (but will depend on that being the only interface try en1 if that doesn't provide what you expect.)
ipconfig getifaddr en0
If in doubt you can always check network prefs via your system settings for your OS.
Once you know that you can set up the prefs file for your firefox OS device.
The proxy prefs are as follows (It goes without saying you'll need to replace 192.168.0.2 with whatever your local ip is. Change the ports if your charles port is not 8888.
pref("network.proxy.backup.ftp", "192.168.0.2");
pref("network.proxy.backup.ftp_port", 8888);
pref("network.proxy.backup.socks", "192.168.0.2");
pref("network.proxy.backup.socks_port", 8888);
pref("network.proxy.backup.ssl", "192.168.0.2");
pref("network.proxy.backup.ssl_port", 8888);
pref("network.proxy.ftp", "192.168.0.2");
pref("network.proxy.ftp_port", 8888);
pref("network.proxy.http", "192.168.0.2");
pref("network.proxy.http_port", 8888);
pref("network.proxy.no_proxies_on", "");
pref("network.proxy.share_proxy_settings", true);
pref("network.proxy.socks", "192.168.0.2");
pref("network.proxy.socks_port", 8888);
pref("network.proxy.ssl", "192.168.0.2");
pref("network.proxy.ssl_port", 8888);
pref("network.proxy.type", 1);
If you're already using your own user prefs then append these lines to the file. If not create a file called custom-prefs.js and then push it onto your device:
adb push custom-prefs.js /data/local/user.js
Now restart:
adb reboot
This should get the device talking to charles. However at this point, anything that uses SSL you won't be able to see the requests for.
Before you can do that, first you're going to need to generate your own cert for charles. It seems that recent Firefox versions see charles' CA cert as expired which can be a big red-herring to getting this working.
Update 29th November 2014
After talking to some colleagues the cause of the expired certificate is due to the way that Firefox validates certs. The more recent versions of Firefox only allow certs with start dates after the unix epoch (1st Jan 1970). As the Charles CA cert has a start year of 1899 it's seen as expired.
Generate your own CA cert for charles
It's a good idea to make your own CA cert for Charles - so this step isn't so bad in the long run. As long as you keep your cert and keys safe no-one can abuse it.
There's an excellent post with both the rationale and the low-down on how to generate your own cert here: Securing Charles Proxy with a Personal CA
Note: This post assumes openssl.conf is under /opt/local/etc/openssl which it will be if you've installed openssl with homebrew e.g brew install openssl.
I'll reproduce the broad strokes here to keep all the instructions relevant to this post in one place:
# Setup a directory to hold this info.
mkdir -p /usr/local/CharlesCA
cd /usr/local/CharlesCA
mkdir certs private newcerts
echo 01 > serial
touch index.txt

# Next create the CA cert
openssl req -new -x509 -days 3650 -extensions v3_ca \
-keyout private/ca_key.pem -out certs/ca_cert.pem \
-config /opt/local/etc/openssl/openssl.cnf
At this point you'll need to set a passphrase and enter some basic info. Charles will ask for this passphrase when it needs to.
Next we are going to run a command to generate the PKCS12 format that charles expects.
openssl pkcs12 -export -out ca_cert.pfx -inkey \
private/ca_key.pem -in certs/ca_cert.pem
So the files we get from this process are:
- ca_cert.pfx - this is what we need to point charles at.
- ca_cert.pem - this is the ca certificate to add to clients
- ca_key.pem - this is the key (keep this safe).
Now we have this we need to point charles at the ca_cert.pfx ca cert we just generated. When we do this Charles will ask for the passphrase.
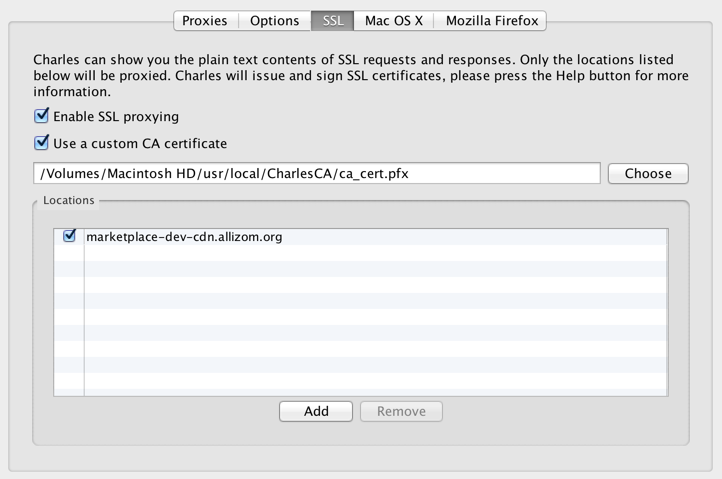
Next it's a good idea to test out running Firefox with charles and makes sure SSL proxying is working. To make that happen you'll need to enable SSL proxying for a host of your choice. See above for an example.
To make firefox work with Charles we'll need to add the ca_cert.pem into firefox. I just use the Firefox -> Preferences -> Advances -> Certificates and the click View certificates and then import. Find the ca_cert.pem generated before and import that and check This certificate can identify websites.
Next try and view a site using the ssl host you set up. You should be able to look at responses.
Adding the custom CA to FFOS
Assuming that went well we're ready to add the custom cert to FFOS. There's an interface under the device's wifi settings that allows the import of certs (if they're pushed to /sdcard/downloads first) but this didn't seem to work for me. It might just be that you can't set trust correctly (there's no interface for that) via this route, which stops it working.
To add our own cert we'll need to use the nss tools. In particular certutil is the command we'll use to add a cert to your device.
You can install the nss-tools on OSX with brew install nss however be aware this might cause havoc with Firefox sync see my post on this issue. If that's the case you can build the nss tools yourself (I'll leave that as a yak to shave for the reader).
First we'll run some commands to get the existing cert9.db and key4.db off the device.
Here's a little script that will pull the certs into the same dir (or you can just run the commands one at a time if you prefer).
#!/usr/bin/env bash

adb wait-for-device
PROF_DIR=$(adb shell echo /data/b2g/mozilla/*.default | tr -d '\r')

echo $PROF_DIR

echo Copying ${PROF_DIR}/cert9.db
adb pull ${PROF_DIR}/cert9.db .

echo Copying ${PROF_DIR}/key4.db
adb pull ${PROF_DIR}/key4.db .
To back them up the first time you can run:
cp cert9.db{,.bck}
cp key4.db{,.bck}
This will give you a backup just in-case.
Next we need to clear the existing password, so we don't get errors trying to add our CA cert.
certutil -W -d sql:.
When the prompts appear just hit enter twice.
Now let's add our ca_cert.pem file.
certutil -A -n 'Charles Custom Cert' -i /usr/local/CharlesCA/certs/ca_cert.pem -t 'TC,,' -d sql:.
This assumes the cert file is in the location as per the custom CA generation steps above.
Now the next step is to validate that the cert added is good for our purposes:
certutil -V -u 'V' -n 'Charles Custom Cert' -d sql:.
You're looking for output like so:
certutil: certificate is valid
If that's good then you're all set.
The final step is to push back the files:
Assuming you're in the same terminal session you can use the following commands.
adb push cert9.db ${PROF_DIR}
adb push key4.db ${PROF_DIR}
adb reboot
If not run this again first and then re-run the push commands above:
adb wait-for-device
PROF_DIR=$(adb shell echo /data/b2g/mozilla/*.default | tr -d '\r')
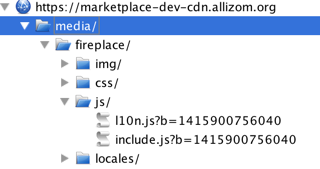
Next try hitting the same URL you verified that SSL proxying worked for with Firefox and you should see that FFOS is now both using the proxy and SSL proxying is taking place on the host you specified.
The traffic should show up with the files under the host like so:
Turning off the proxy
When you're done with the proxy remember to remove the prefs. Hopefully at some point they'll be a way to turn this on or off from the device settings.
Notes and references
mozTCPSocket requests don't seem to work via the proxy if they require SSL. You'll see bad_certificate in charles. I don't know of a workaround for this presently (so I'd suggest avoiding proxying hosts that use that).
This post wouldn't have been possible without the following - my thanks goes to the authors for sharing their wisdom:
- Adding CA to FirefoxOS
- Securing Charles Proxy with a Personal CA
- Intercepting Firefox OS traffic using a proxy
Over to you
It's likely the steps to do this might get shorter in due course or short-cuts will be found. If you find a better way to do any of this or have extra OS specific notes or additional useful references please let me know in the comments.
Also if you manage to shave all the yaks and get this working based on these instructions please let me know too.